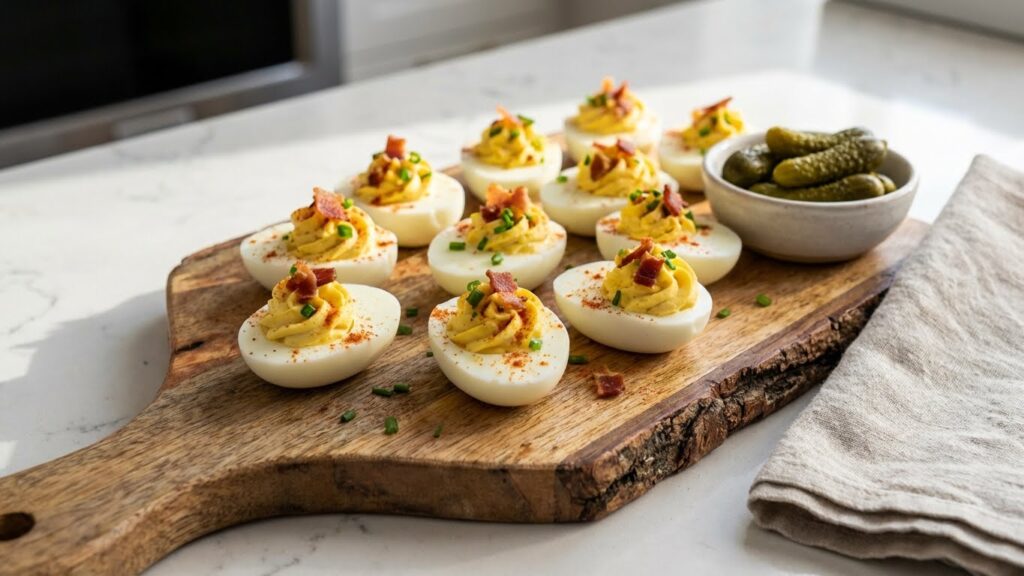
The Best Deviled Eggs Recipe You’ll Crave Again
When I first started making deviled eggs for our holiday parties and neighborhood potlucks, I learned that even a simple ingredients mix could turn this classic appetizer into something truly delicious and surprisingly popular, especially during holiday dinners like Easter, Thanksgiving, or Christmas, and over the years.
I’ve come to enjoy playing with the texture of the filling by folding in diced onion, celery, and even a touch of relish, all bound together with creamy mayonnaise, extra mayonnaise, a little mustard, and the richness that comes from mashing yolks after hard-boiling, peeling, and slicing eggs, then refilling egg white halves with a mixture that’s lightly seasoned with salt, pepper, and a gentle sprinkle of paprika, along with small additions of fresh herbs, leaving the top beautifully garnished with a warm color and a bright flavor that reminds me why this recipe has stayed a go-to at all our parties.
Ingredients (serves 2–3)
- 4 large eggs
- 2 tablespoons mayonnaise
- 1 teaspoon mustard
- 1 tablespoon finely diced onion
- 1 tablespoon finely diced celery
- Salt and pepper, to taste
- Paprika, for garnish
- Optional: relish or fresh herbs for extra flavor
Step-by-Step Instructions
1. Boil the Eggs
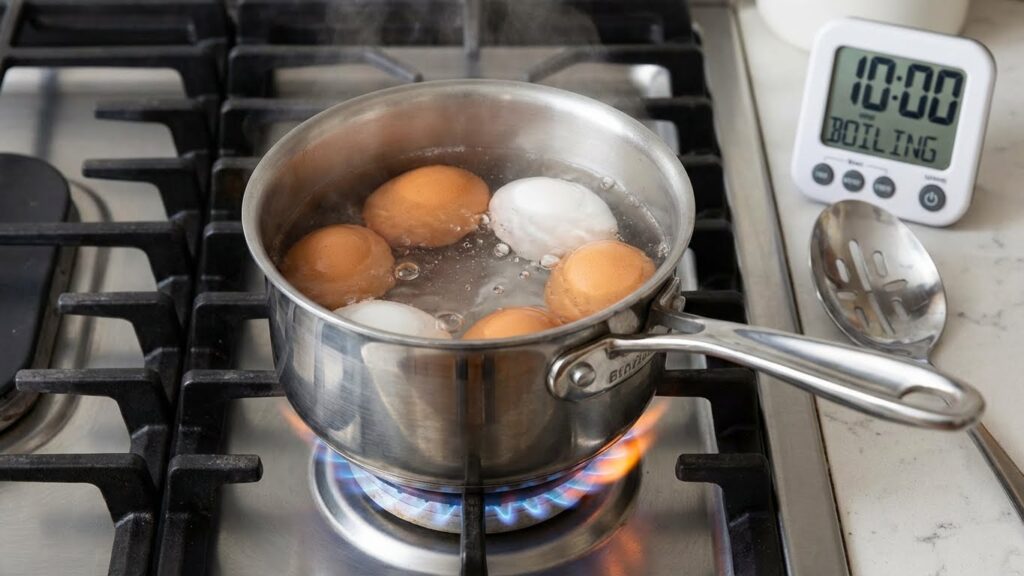
To begin making deviled eggs, place the eggs in a small pot and cover them completely with cold water. Bringing the water to a gentle boil helps the eggs cook evenly without cracking. Once the water reaches a steady boil, let the eggs cook for 10–12 minutes to ensure the yolks are fully set. This cooking time creates the ideal texture for a smooth filling later. Avoid boiling too hard, as it may cause the shells to break. When done, turn off the heat and prepare to cool them immediately.
2. Cool and Peel
After boiling, transfer the eggs to a bowl filled with ice water to stop the cooking process. The sudden cooling helps loosen the shells, making peeling much easier. Allow the eggs to sit in the ice bath until completely chilled, about 5–10 minutes. Once cooled, gently tap the shells to crack them and peel carefully to keep the whites smooth. Cooling also improves the texture of the eggs. Set the peeled eggs aside for slicing.
3. Slice the Eggs
Place each cooled egg on a cutting board and slice it lengthwise with a sharp knife. Cutting gently ensures the egg whites stay clean and intact. After slicing, carefully remove the yolks and place them in a small mixing bowl. Handle the whites gently so they don’t tear, as they will be filled later. Keeping the whites whole makes for a neat and attractive presentation. Set the egg white halves aside on a plate.
4. Make the Filling
Mash the yolks with a fork until they become smooth and crumbly. Add mayonnaise, mustard, diced onion, celery, salt, and pepper for flavor and creaminess. Mix thoroughly until the filling turns silky and well combined. The mixture should be soft enough to pipe or spoon easily into the egg whites. Adjust the ingredients if the filling seems too thick or too dry. Aim for a balanced, creamy texture that spreads smoothly.
5. Taste and Adjust
Before filling the eggs, taste the yolk mixture to check the seasoning. Add more salt and pepper if the flavor needs a boost. You can also mix in relish if you prefer a sweeter or tangier filling. Tasting at this stage helps you customize the flavor exactly the way you like it. A well-seasoned filling makes a big difference in the final dish. Adjust until the flavor feels just right.
6. Chill the Filling
Place the yolk mixture in the refrigerator for 15–20 minutes. Chilling allows the flavors to blend together more deeply, improving the overall taste. The cooler temperature also firms up the filling, making it easier to pipe or spoon neatly. This step ensures the texture is smooth and consistent. A slightly chilled filling holds its shape better inside the egg whites. Don’t skip this step for the best results.
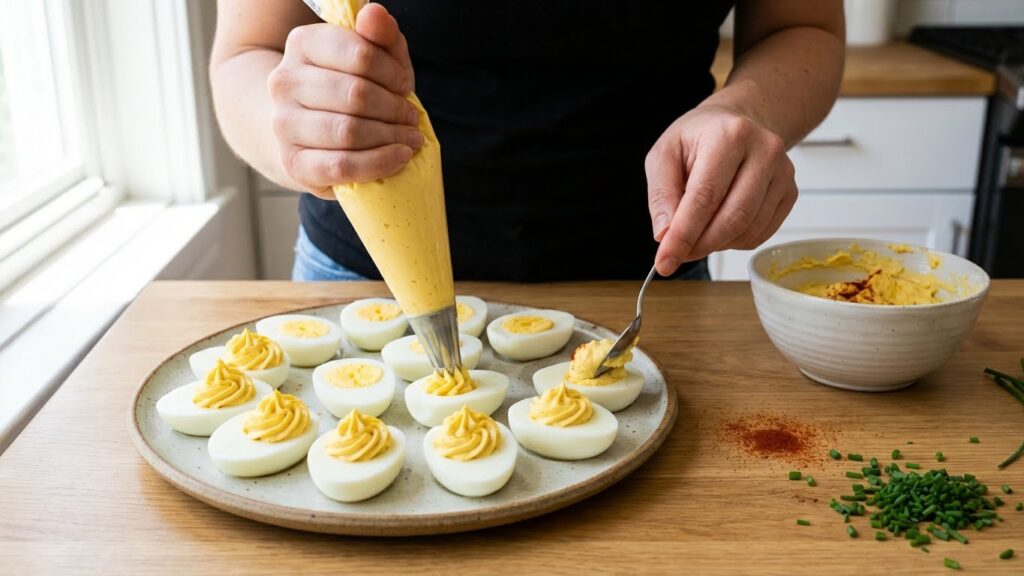
7. Fill the Egg Whites
Once chilled, spoon or pipe the creamy yolk mixture back into the hollow egg white halves. Using a piping bag creates a more decorative look, but a spoon works just as well. Fill each half generously so the eggs look full and appealing. Work carefully to avoid tearing the whites. The creamy filling should sit neatly inside the center. Arrange the filled eggs on a serving plate as you go.
8. Garnish and Serve
Finish the deviled eggs by sprinkling a light dusting of paprika on top for color and extra flavor. You can also add fresh herbs like chives or parsley for a bright, fresh touch. Garnishing enhances both the appearance and taste of the dish. Serve the eggs chilled for the best texture and flavor. These deviled eggs make a perfect appetizer for parties, gatherings, or everyday snacks. Enjoy them fresh for the best experience.
Nutrition Information (Per Serving)
- Calories: 120–150
- Protein: 6–7 g
- Fat: 10–12 g
- Saturated Fat: 2–3 g
- Carbohydrates: 1–2 g
- Sugar: <1 g
- Cholesterol: 185–200 mg
- Sodium: 160–220 mg
Storage Instruction
To keep your deviled eggs fresh and safe to eat, store them in an airtight container in the refrigerator as soon as you’re done preparing them. Make sure they are arranged in a single layer to prevent smudging the filling. Deviled eggs stay at their best for up to 2 days, though they taste freshest within the first 24 hours. Avoid leaving them at room temperature for more than 2 hours, especially during parties or holiday gatherings. If you need to prep ahead, you can store the egg whites and filling separately for 1–2 days and then assemble them just before serving for the freshest texture and flavor.
Conclusion
Deviled eggs are a classic, easy-to-make appetizer that combines creamy filling with the soft texture of boiled eggs for a delicious bite. Their simplicity, versatility, and rich flavor make them perfect for parties, picnics, or everyday snacks. With just a few basic ingredients, you can create a dish that looks elegant and tastes satisfying. Whether served plain or with extra toppings, deviled eggs remain a timeless favorite enjoyed by all.